Word Documents
Make accessible Word Documents using the built in accessibility checker
- Microsoft Office: Rules for the Accessibility Checker
- Microsoft Office: Use the Accessibility Checker on your Windows desktop to find accessibility issues
- Microsoft Word: Make your Word documents accessible
Adding Accessible Elements in Word Documents in Microsoft Word
Headings in Word Documents

Apply a heading style
- Type the text of your heading, and then select it.
- On the Home tab, in the Styles group, click the heading style that you want. If you don’t see the style that you want, click the More button to expand the Quick Styles gallery.
Alternative text for images in Word Documents
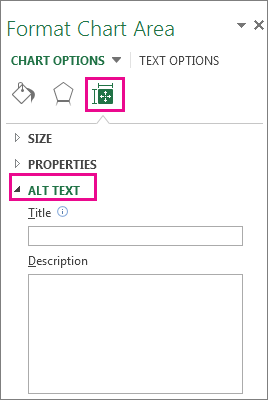
Add alt text to a chart, picture, SmartArt, or shape
- Right-click the item and click Format Chart Area, Format Picture, Format Object, or Format Shape. The menu item will vary depending on which app you’re using.
- Click Size & Properties (Layout & Properties in Word and Outlook) and click Alt Text.

- In the Description box, enter an explanation of chart. This box should always be filled in.
- If you want, enter a brief summary in the Title box. This box should only be filled in if you are entering a detailed or long explanation in the Description box. By using the Title box, people won’t need to read the full description unless they want to.
Instructions from Support.office.com
Adding Links to Word Documents, Excel Documents, Powerpoint Documents, and Outlook Messages
This text is from “Create or edit a hyperlink” on support.office.com, please read the full documentation through this link.
Applies To: Excel 2016, Word 2016, Outlook 2016, PowerPoint 2016, Office 2016, Excel 2013, Word 2013, Outlook 2013, PowerPoint 2013, Excel 2010, Word 2010, Outlook 2010, PowerPoint 2010, Excel 2007, Word 2007, Outlook 2007, PowerPoint 2007, Office 2007, Office 2010, Excel Starter 2010, Word Starter 2010, Office 2013
The fastest way to create a basic hyperlink in an Office document is to press ENTER or the SPACEBAR after you type the address of an existing webpage, such as http://www.contoso.com. Office automatically converts the address into a link.
In addition to webpages, you can create links to existing or new files on your computer, to email addresses, and to specific locations in a document. You can also edit the address, display text, and font style or color of a hyperlink.
Create a hyperlink to a location on the web
- Select the text or picture that you want to display as a hyperlink.
- On the Insert tab, click Hyperlink button
 .
.
You can also right-click the text or picture and click Hyperlink on the shortcut menu. - In the Insert Hyperlink box, type or paste your link in the Address box.
Note: If you don’t see the Address box, make sure Existing File or Web Page is selected under Link to.Optionally, type different display text for your link in the Text to display box.Note: If you don’t know the address for your hyperlink, click Browse the Browse the Web button to locate the URL on the Internet and copy it.
Optional: To customize the ScreenTip that appears when you rest the pointer over the hyperlink, click ScreenTip in the top-right corner of the Insert Hyperlink dialog box and enter the text you want.
Lists in Word Documents
Starting with a blank page?
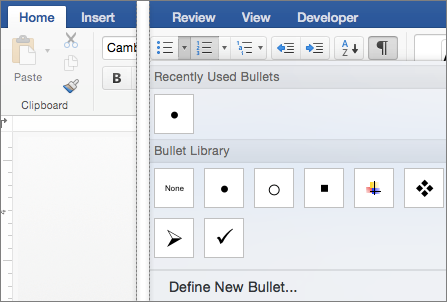
- Place your cursor where you want a bulleted or numbered list.
- On the Home tab, click the arrow next to Bullets or Numbering.
- Choose a style and start typing.

-
Press Enter every time you want a new bullet or number, or press Enter twice to end the list.

Restart numbering at 1
- Click the item that you want to be the first item in the new list.
- Ctrl+click or right-click the item, and then click Restart numbering.
Indent items within a list
- Select the lines in the list that you want to indent.
- On the Home tab, in the Paragraph group, click Increase Indent
 .
.
Delete items from a list
- Select the items that you want to delete.
- Press DELETE.
Stop a bulleted or numbered list
Do one of the following:
- At the end of the bulleted or numbered list, press RETURN two times.
- Select the line of text that you do not want in the list, and then, on the Home tab, in the Paragraph group, click Bulleted List
 or Numbered list
  .
.
Instructions from Support.office.com
Forms
Although it is possible to create forms in Microsoft Word Documents, we strongly recommend not using word doc, excel, outlook, or pdf forms, but rather using web based forms instead for security and accessibility reasons. Please read this section about forms from our help site top learn more about forms and making them on our website.